Now that Valentine’s Day is finally behind us and you’ve successfully weathered the storm of single-shaming and commercial romance, it’s time to focus on what really matters in life – Reese’s Peanut Butter Cup cupcakes.
Before we begin, there are two things you need to know about Reese’s Cup Cupcakes. The first thing you need to know about Reese’s Cup Cupcakes is that everybody loves them (provided they aren’t allergic to any ingredients). Reese’s is the most popular brand under the Hershey’s umbrella and by some transitive property of algebra that makes Reese’s Cup Cupcakes the most popular cupcakes in America according to our boys in the ACS lab – and they know everything, trust us.
The second thing you need to know about chocolate and peanut butter cupcakes is that they’re super easy to make and make well. “But guys!” you might be saying, “I don’t know how to bake and the Reese’s cupcakes on Pinterest look so fancy! I can’t do that!”
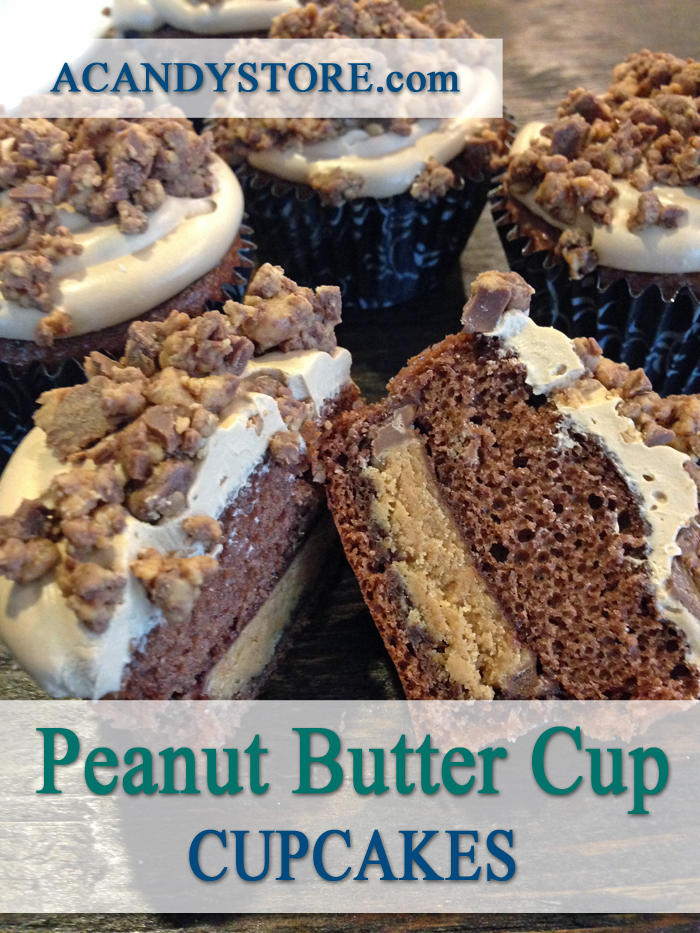
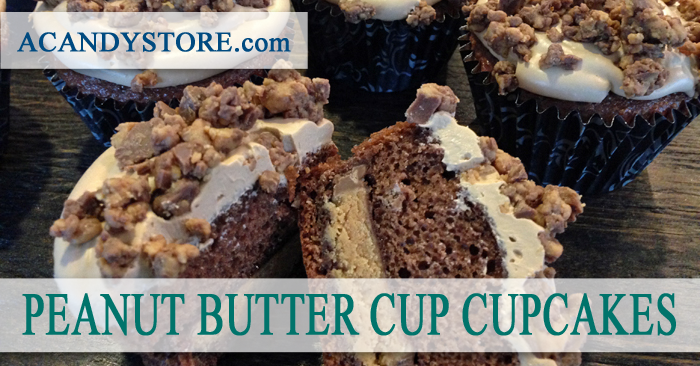
Wrong. You can do that. Look at the cupcakes in our header image. You think years of skill and an array of tools were required to make those bad boys? It sure looks like it, but really the only thing that went into those cupcakes was a little creativity, some prepackaged frosting and a whole entire honkin’ Reese’s Cup. Yeah, you heard us correctly.
Today we are going to teach you to make these Reese’s Cup Cupcakes exactly as they appear in the photos we’ve published in this post. You will not need a culinary degree. You will not need an array of expensive decorating tools. You will not even need opposable thumbs, though they would help. All you need are the ingredients listed below and about an hour to kill. Let’s get started, shall we?
The Ingredients
We got the inspiration for this recipe from one of our favorite blogs, Center Cut Cook. Ashley’s Peanut Butter Cup Brownies were awesome and we couldn’t help but appropriate her technique into an original cupcake recipe. So if any of the ingredients seem familiar here, that’s why. That said, here’s what you’ll need to make the cupcakes (hint: you can buy it all at a store):
1 Package Full Size Reese’s Peanut Butter Cups
1 Box Milk Chocolate Cake Mix
1 Container of Whipped Vanilla Frosting
Wilton Brown Food Dye
Some Eggs (Number Specified on Cake Mix Box)
Vegetable Oil (Volume Specified Cake Mix Box)
A Nut Chopper or Food Processor or Blender
Baking Cups
A Cupcake/Muffin Pan
Self Confidence
The Super Easy Directions

Okay you darling fledgling baker, here’s what you need to do.
The Cupcakes
1. Make the Cake Batter. Your box of cake mix has instructions on the back that detail how to turn it into cake batter. Typically you’ll need to add oil, water and a few eggs and mix or beat it all together for a few minutes. So go ahead and do that. While you’re at it, go ahead and preheat your oven to whatever temperature the box recommends for cupcakes. It’s okay – we can wait.
2. Fill Wrappers 1/3 Full with Batter. Line your cupcake pan with baking cups. Fill the cups about a third of the way with batter. Pro Tip: If you don’t have non-stick baking cups, spray the interior with a little cooking spray before you add the batter. This will make the cupcakes easier to eat.
3. Add Reese’s Cup and Cover. Unwrap a Reese’s Cup. Press it down gently into the baking cup until it partially sinks into the batter. Then pour batter on top of the Reese’s Cup until the baking cup is about 2/3 full. Repeat this process until all of your baking cups are full.
4. Bake! Put your cupcake tray in the oven. Your mix box should have a suggested baking time for the cupcakes. Plug this into a timer and wait. Check on your cupcakes periodically using the toothpick test. As soon as you can insert a toothpick into the center and remove it cleanly without any crumbs, it’s time to take the cupcakes out of the oven.
The Frosting
1. Chop Up Peanut Butter Cups. Stick four or five Reese’s Cups into your food processor or blender or whatever. Chop them up until the crumbs are small enough to use as sprinkles.
2. Dye the Frosting. Open the frosting. Add a few drops of the brown food coloring and stir with a butter knife. Repeat this process until the frosting reaches a desired hue of off-white/light brown.
3. Wait for Cupcakes to Cool. Seriously. Wait for your cupcakes to cool completely before you ice them. If you try to add the frosting while they’re warm, you’ll end up with a crumble apocalypse. Nobody likes a crumble apocalypse.
4. Ice the Cupcakes.Add a dollop of frosting on top of each cupcake. Smooth it out with a butter knife.
5. Sprinkle Reese’s Cup Crumbles. Take a pinch of the Reese’s Cups you just pulverized and sprinkle it on top of a cupcake. Repeat this process until all of your cupcakes are decorated.
Share and Enjoy

Congratulations! You have just baked a batch of the easiest and most amazing Reese’s Cup Cupcakes ever created. Enjoy them with your family or bring them to a party and impress everyone who ever made fun of your lack of cooking acumen. Either way, give yourself a pat on the back for adding a great new recipe to your lexicon.
If you want to be really cool, you can share this recipe with your friends so everyone will know how great we are and how much you love us. All you need to do to spread the word is click one of the social media icons on the tool bar below this paragraph. C’mon – you know you want to.
There we go, that feels good, doesn’t it?
Stay Frosty,
The ACS Team